John gave me a call several weeks ago asking if I could take an oil can flat and turn it into a regular looking can for him. Not just any can though...a fairly rare Hoosier Pete 1 quart can. I wasn't able to get to it right away, but got to thinking that it would be neat to photograph the process and share it with everybody here on oldgas. It will take me several days to post the pics and descriptions of the process so tune in the next few days to check on the progress. The suspense will probably drive John crazy, but we will have fun with it anyway...lol.
The first picture is of the original flat as it arrived in the mail...it was sent in a flat mailer...maybe I should send it back in that same mailer??
The next four pictures are of the tools that I use to perform the transformation.

Here are the tools that I used...nothing high tech here. Feel free to ask questions as we go along. Tomorrow we will start the process of putting the vertical seam on the can.

Description: A light duty brake to bend the edges of the can for the seam.

Description: An anvil, hammer, and hardwood block for forming the seam.

Description: Arbor press and original dies for stamping the SAE designation in the lid...John's can will be 20-20W.
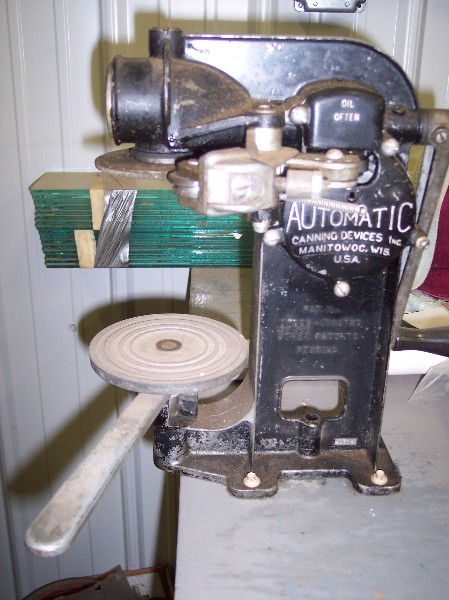
My picture captions ended up in the wrong place! The captions should be up one picture. I hope I am better at working with cans than computers...lol. The last picture of course is the trusty Manitowoc sealer for the lids.
i thought john only did globes??LOL
Cool can't wait to watch this topic!
No Mick i didn't flatten a can with a globe or nothing like that! I don't think i have ever seen any Hoosier Pete cans that weren't flat. Ones i have seen have been rolled and lidded.
its going to look good john
Okay here we go...let's bend some metal. The first step is to use the metal brake to bend a small flange on each end of the flat. The amount bent is usually about 3/16"...this depends however on the original length of the flat. Most of the flats that I have done were about 12 5/8" long. If they are short you bend a little less, if they are long you can bend a little more. In this case the flat was just the perfect length. When looking at the printed side of the flat, one end must be bent up and the other must be bent down so that the two ends can "hook" together when the can is formed. In the first picture you will see the printed side of the flat when it is in the metal brake and in the second picture you will see the back of the flat...this assures one end bent up and the other bent down.

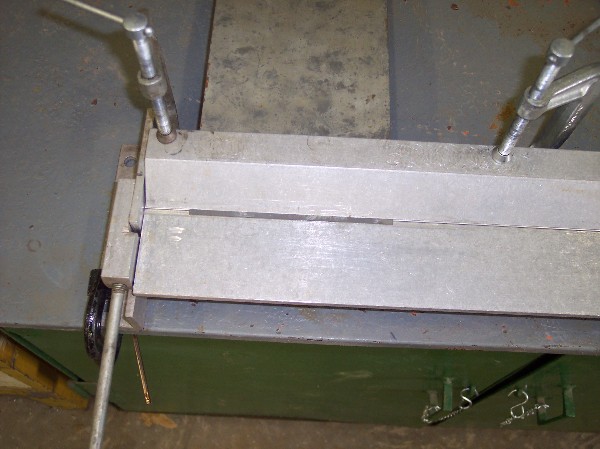
The nice part about using this small light duty brake is that the top bar that you are bending against is not attached to the brake itself, but rather held in place with two C-clamps. This allows you to move that bar forward to bend a really narrow strip...in this case 3/16". Most larger brakes won't "grab" the metal in this case.
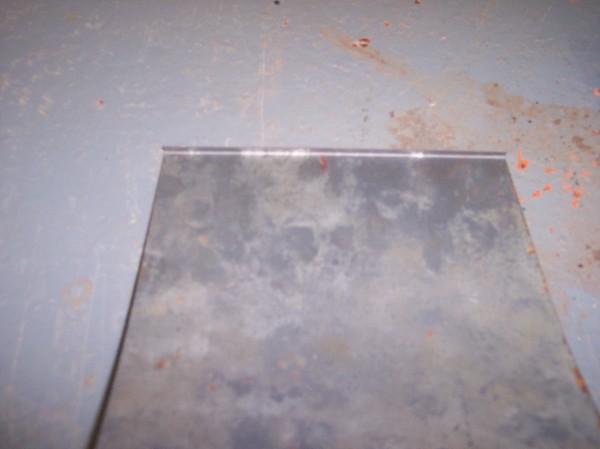
These next two pics show the flanges on the flat after they were bent with the brake...the key here is to get them bent past 90 degrees...they will get bent further in the next step.

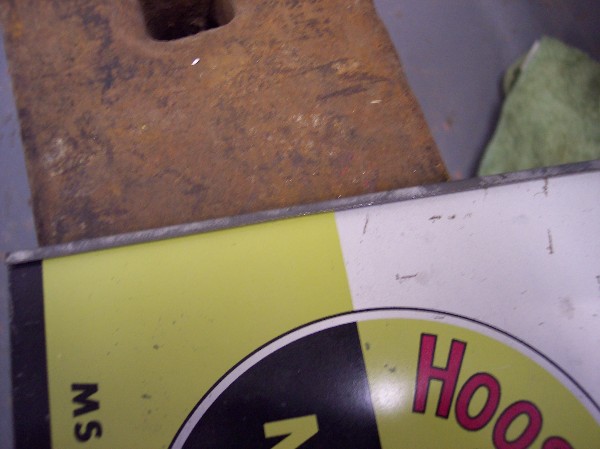
The next step is to take those flanged ends and bend them further. They need to be bent almost to the point where they are a hem, but not quite. There has to be enough room between the original flat and the bent over flange so the flange on the opposite side will slip in easily. This further bending is accomplished by gently tapping with a hammer with the flat on the anvil...it doesn't take much. On one side the printed side of the flat will have to face down...a rag is used under the flat to protect the paint. These next two pics show what the ends look like after this process is complete.

Tomorrow we will try to make this thing round! DB if you are interested in giving it a go, let me know and I can send you some NOS flats to play with.
One question....are we starting out with a can that never made it to the "round" at any time in it's life, a blank so to speak. I ask because I know people used to cut them at the seam and flatten them and of course there are instances where a modern day collector is wanting to re-round the flat.
Too cool to see the can going together!
Dave i understand there hasn't been any Hoosier Pete cans found that weren't flat. Go figure but the ones i have seen have been rolled.
Dave, that is correct...this one was never made into a can. It was printed and cut out and that was the end of the line for it. My guess is that it was rejected because there are some fingerprint like smudges in the paint. I have two different Hoosier Pete cans that I have rolled and they were also unused flats that have the same type of smudges in them. I have some Shell Penn cans that I made from unused flats and they both have smudges that are clearly fingerprint marks.
Now comes the tricky part. The flat has to be "rolled" so that it is actually round like a can. This is done by taking hold of the flat with both hands as close as possible to those "hems" that were just finished at the seam and pulling them and "hooking" them together. This has to be done as carefully and as close to the seam as possible to reduce the chance of putting a kink in the can. The next two pictures show what it looks like after the ends of the flat are hooked together. Notice that the shape is somewhat distorted at this point.
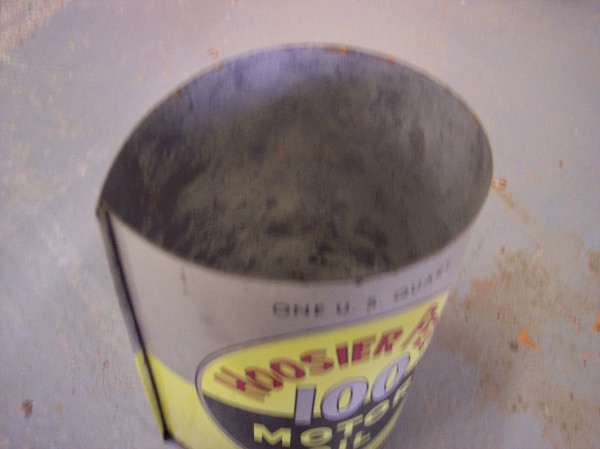
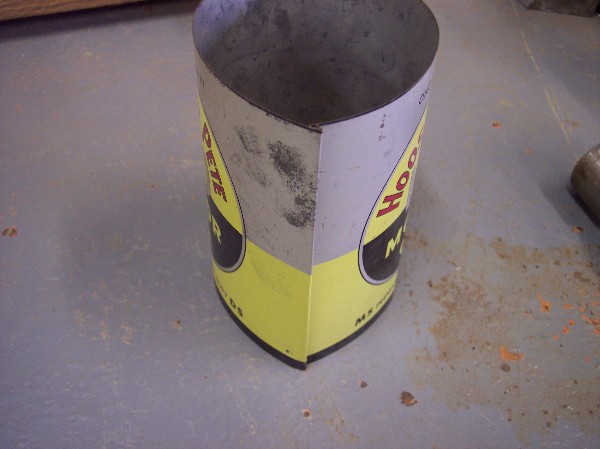
Notice that most of the distortion in the shape of the can is gone...when the top and bottom are installed that will take care of the rest.
The next step is to stamp the top lid with an SAE designation. This can will have the 20-20W stamp. For this process the arbor press along with a set of original dies is used. The lid is centered on top of the male die with the top of the lid facing up. The female die is then placed on top of the lid...this is done carefully with the aid of alignment marks to make sure that the two dies line up correctly for the stamping. The arbor press is used to put some pressure on the dies and then the top of the press is given a good strike with the hammer. The next several photos show this process.


Tomorrow I will show how the top and bottom of the can is flared and lids installed to complete the can.
This is very interesting. Somehow I expected something more complex in the seam itself.
That's also interesting about the Hoosier Pete can and known examples having only been from flats.
Is it a certainty that this brand was actually marketed using this label?
Is this tech week? Way cool! I come across flats all the time but have been at a loss to find a way to seam them together.
Damn , I could learn some great sheet metal tips from you ! Thanks for sharing the information with us - really ! Ed Shaver
TeeTee--To get the finished look along the seam, did you use the wood block placed along the edge of the seam or how did you do that? I expected a flat folded seam but yours actually folds over the other seam and sort of "locks" itself in place, just like a factory seam would be. I was wondering if you needed a special tool for that or was the wood block enough? Thanks---KEVIN
Dave...when I first started thinking about rolling cans, I also thought that it would be much more complicated. Often times we tend to over think things.
Kevin...Just used the wood block. After a few cans it gets a small groove indented in it and gives the nice looking seam.
What kind of price would one be looking at to have a "flat" made into a round can? I have my "Red Indian Aviation can" that I have been thinking would look good "round", again.
And...drum roll please...here is the completed can.
Total time was about a half hour including taking of the pictures. Without pictures it takes about 15 minutes from start to finish....assuming that I have some lids stamped and ready to go.
If you have any questions, feel free to ask. If you run across any flats the key measurements for them to be usable are approximately 12 5/8 long by 5 11/16 tall...give or take a little.

I don't have John's address handy...anybody want to buy the rights to have their name and address put on the box??? lol

i'll give you five for the rights!!LOLdid you make sure you packed that REALLY well?
Wow is that great TeeTee. Super work. Being from IN as well, I love the can. Thanks for the tutorial!
Ryan
Now I wanna go buy a machine and try it myself! Great tech!
Hmmm those sheets of 30/32ga in the shop just might make some good oil can sides! tt
Tee Tee, I am not a big time can collector but the the end result was a great can, and the process you showed us was a real treat. Thanks for sharing with us.Norm
Most Home sealing machines will work, but I believe the AUTOMATIC MASTER SEALER [like above] is the Best although more expensive,$495 hand crank or $1,790 for electric NEW. IF buying used, make sure it has the correct can Chuck [#2 1/2] or that will cost you $150 from the manufacture.
Machine I use for 5qt can [manufacture said it wouldn't do that size] would have cost $2470 IF I had bought it New.
If I didn't make Copy cans, I could never recover enough to buy good machines.
jm2c
Killer!!!! Can't wait to get the can! Kevin you ever come down to Evansville make sure you look me up! PM you my address.
It looks much better being round.
How long did it take?
That was very interesting. I enjoyed seeing the process. Thanks very much. Mitch
I wonder if the famous Weasel Oil cans are made the same way?????
Heck No, I use New cans for all my copy cans. Fill them with ?? then put lids on.
Kevin the can looks great. Very nice job

That's a very cool can - should go nice with your globe, John!
Dick, what is "??"?
Wes
Kevin, real nice job on the can.
Wes ?? is orange peels or other stuff lol

?? = Weasel Pee or worse !
...I remember there being some unused Gulfpride lids on eBay a while back, wish I had tried to get'em now...
...Tee Tee...or Dick...this Hoosier Pete can is of 'normal' height, because it was a flat cut to size by the can company, just never originally made into a can, right?...
...if you reconstructed a can that had originally been a can, but was cut and flattened to patch the roof, or whatever - that reconstructed can would be a little shorter than normal, because of the metal 'lost' when lidding the can, correct?...or am I mistaken...
"..Tee Tee...or Dick...this Hoosier Pete can is of 'normal' height, because it was a flat cut to size by the can company, just never originally made into a can, right?..."
Correct.
"..if you reconstructed a can that had originally been a can, but was cut and flattened to patch the roof, or whatever - that reconstructed can would be a little shorter than normal, because of the metal 'lost' when lidding the can, correct?...or am I mistaken..."
After the center of lids are removed & seam is cut, IF the RIM of lids is removed, then can flat will be shorter top/bottom.
In that case, I would/will attach the FLAT to a donor/new can.
An Un-rolled qt flat should meas. 5 11/16" x 12 9/16-5/8"
db
I'm all ways looking for OLD N.O.S. lids [stamped or plain], 1qt, 1gal & 5qt size. Appreciate being notified of any seen.
...good answer...
...now - if the can to be relidded had the rim, but the lid was cut out, could the can be relidded without loss in height?...or would the part of the can that's crimped into the cut out rim be unusable?...
...does that make sense?

When I re-lid a can, I remove the RIM of old lid carefully, remove dents best I can, then attach the new lid[s] like originally installed.
I will fill a can with new oil IF that's what the owner of can wants. Even the original filler of the can Couldn't guarantee against some leakage [does ANYONE remember buying a 24 can case that wasn't oil soaked/stained ?].
4 qts Received [showing both sides]

4 qts Returned
These were a challenge ! NOT LOL
Dick, that is impressive, do you have a "hammer form" to help reshape the cans? do you use leather or cloth covered tools to save the paint? Thank for sharing! metalwork it fun! tt
Thanks.
NO.
Any type of covering would hide any ink/paint in the area that was being worked in the process of removing dents.
Alum. qts are usually a Bit*h, being a softer metal it will stretch [some] when the dents are made & will not shrink back when dents are removed.
Real hard to remove the RIM on Composite qts w/o losing some of the ink/paint.
I do not touch up or repaint any area that is missing ink/paint.
db
wow Dick, very impressive
Hey Dick..... why don't you start your own how-to thread to show us how you do things.
...very informative thread...
...I have (at least) one more question...has anyone perfected a way to get dents out without removing the lid?...I'm not talking about those former basket cases that DB masterfully resurrected, I'm talking your basic %$#@ dent that you just can't pop out by putting your thumbs on either side of and pressing...
...I've tried the 'screwdriver' method, it's not practical unless you've got a churchkey opening right over the dent...and I've tried 'air pressure' (putting a cloth over the churchkey hole and exhaling into it as hard as I could...
...just curious - I've got a few cans that have some annoying dents, but are too nice (IMO) to resort to replacing an original lid (and some are full)...I got'em figuring that there had to be a way...?
Are new lids available or just working off old stock?
Hi,
I saw your photo essay on the Hoosier Pete can and wondered if you work on dented cans as well? I picked up one recently that I would like to have the dents removed from it. I can send you some pictures of it to get an idea of what work would be required. I would be curious what you would charge to repair it.
Thanks,
Tom Allen

